E Ink Segmented Quick Start Kits

Kits

E Ink Segmented Quick Start Kits

  • Segmented ePaper Display
  • Simple, low power consumption

Introduction

Download

Support

PRODUCT DESCRIPTION

Introduction

Welcome to know more product details

Introduction

Download

Support

PRODUCT DESCRIPTION

Introduction

Welcome to know more product details

E Ink Segmented Quick Start Kits

The E Ink Quick Start Kit is an excellent tool for evaluating and understanding E Ink segmented displays. Standard E Ink segmented displays allow for easy integration into an embedded system at a low cost to trial, making it fast and affordable to develop prototypes. The understanding gained by using the kit will also allow an engineer to construct a simple demo for others in their organization and evaluate if custom E Ink segmented displays will add value to their product. The sample code can be used to understand how the display can be driven by the target system easily. Written in C, much of the sample code can be used in the end design. Using the Renesas RL78 MCU, the E Ink Quick Start Kit is designed for 5 volt driving. E Ink Quick Start Kit works only with PC. Requires Windows XP or later.

The E Ink Quick Start Kit includes:

  • Renesas MCU board designed for 5 volt driving with interconnect to a series of standard E Ink segmented displays
  • Mini USB cable to connect to a Windows™ PC
  • Sample demo project with source code
  • Two standard E Ink segmented displays
  • On-line design guides
  • A Windows™ PC application to configure and run the demo board
  • Standard Parts – Drawings/Pin Map

Buy Now

E Ink Segmented Quick Start Kits FAQ

Getting Started
  1. Install the E Ink Quick Start Kit Software
  2. Open the E Ink Quick Start Kit application
  3. Connect the board using USB to your computer. At the bottom of the window is a status bar which will be green is the board is successfully connected to your computer. If the status bar says "Discovery in Process" then computer is looking to make a connection and will turn green once a connection has been made. If the status bar is not colored, then a connection has not been made. Under that scenario, unplug and replace the USB until a connection is made.
  4. To begin, insert a display into the appropriate connector on the board. To insert the display, slide up on the connector tab. Insert the display so the E Ink active area can be seen on the same surface as the connectors, buttons, and electronics. Ensure the display is accurately placed, aligned, and secured in the connector then slide down on the connector tab.
  5. Next, select "Demo" to launch the quick start kit wizard and follow through each step accordingly.
  6. For additional information about E Ink and how the technology works, select "E Ink Overview."

Display Questions

How to determine the name or model number of a display?

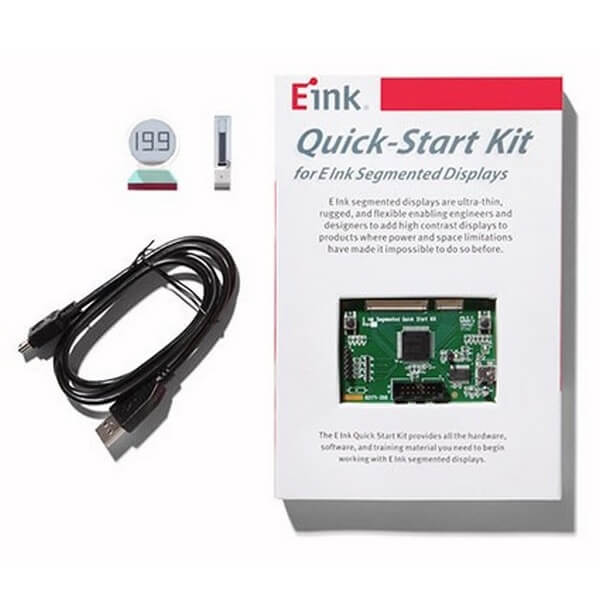
There are five standard E Ink segmented displays that are compatible with the E Ink Quick Start Kit. Included in the kit are the 2.5 digit numeric round display and 14 bar capacity gauge. Additional displays include the 5 bar capacity gauge, 3 digit display, and 6 digit display. You can find drawings of each display at below.


Why is the display not switching?

There are a few potential reasons why a display will not switch. First, ensure the display is accurately placed, aligned, and secured in the connector. An incomplete connection could result in only partial or no switching. Next, confirm you have selected the appropriate display when using the quick start kit wizard. The display connected in the board must match the display selected in the wizard. Lastly, ensure the board is connected to power. The LED on the board is lit green or red when connected to power. If the LED on board is not lit the board is not connected to power.


Why are only a few or random segments switching?

There are a few potential reasons why only a few or random segments switch. First, ensure the display is accurately placed, aligned, and secured in the connector. An incomplete connection could result in only partial or no switching. Next, confirm you have selected the appropriate display when using the quick start kit wizard. The display connected in the board must match the display selected in the wizard. Lastly, the microprocessor on the board stores the code from the previous session. If the display is switching when you connect the board to your computer then board was last used in stand-alone mode and will remain in stand-alone mode until new code is sent to the board using the quick start kit wizard.


Why is the display switching when I connect the board to my computer using USB and the software application is closed?

The microprocessor on the board stores the code from the previous session. If the display is switching when you connect the board to your computer then board was last used in stand-alone mode and will remain in stand-alone mode until new code is sent to the board using the quick start kit wizard.


Why is the display switching when I am using the quick start kit wizard?

The microprocessor on the board stores the code from the previous session. If the display is switching when you are using the quick start kit wizard, then board was last used in stand-alone mode and remain in stand-alone mode until new code is sent to the board after completing the quick start kit wizard.


What is the blue line on the top surface of the display?

Each display is manufactured and shipped with a protective sheet. Prior to using the display, simply peel and remove the protective sheet.


Why does the display flash?

E Ink displays use occasional global updates to refresh the display. The software is designed to send a global update to the display at the beginning of each demo and after ten actions are executed. The frequency of global updates is subjective to the customer and application.


Why does the display appear to have ghosting effects?

E Ink displays use occasional global updates to refresh the display. The software is designed to send a global update to the display at the beginning of each demo and after ten actions are executed. The frequency of global updates is subjective to the customer and application.


Why does the display have less contrast in fast mode?

At 5 volts, E Ink displays will have much greater contrast when updated a slow speed (2 seconds) versus fast speed (500 milliseconds). Longer update times will result in better contrast as it allows the ink in the display to suspend closer to the top surface.


What will happen if I have two displays connected to the board?

If you have two displays connected to the board, one will function as intended assuming you selected to appropriate display in the wizard and the other will have a few or random segments switching as they both share the connection to the microcontroller. The display connected in the board must match the display selected in the wizard in which this case, the additional display does not therefore will receive the wrong information resulting in random segment switching.

Power Questions

How to determine if the board is connected to power?

The board is required to be connected to a computer or AC power using a USB cord to operate. The LED on the board is lit green or red when connected to power. If the LED on board is not lit the board is not connected to power.


How to determine if the display is turned on?

E Ink segmented displays only draw power when switching. The LED on the board will be lit green when the display is not updating and will be lit red when the display is updating.


Why won't the board power on in stand-alone mode?

The board is required to be connected to a computer or AC power using a USB cord to operate in stand-alone mode. There is no battery on board.

Connectivity Questions

How can I confirm if my board is connected to my computer?

Open the quick start kit software and a window will appear. At the bottom of the window is a status bar which will be green is the board is successfully connected to your computer. If the status bar says "Discovery in Process" then computer is looking to make a connection and will turn green once a connection has been made. If the status bar is not colored, then a connection has not been made. Under that scenario, unplug and replace the USB until a connection is made.


Why won't my board connect to my computer?

It appears that you may be missing the required driver for your PC to recognize the QSK board. The driver can be found here: www.ftdichip.com/Drivers/VCP.htm.